VPN (Virtual Private Network)
Some internal resources are not available from outside.
You can use our VPN solution to access most of them.
Resources available via VPN:
- Intranet sites (intranet.eva.mpg.de)
- Citrix Terminal services (citrix.eva.mpg.de)
- SSH Gateway (ssh mpi_username@sshgw.eva.mpg.de)
- GitLab (vcs.eva.mpg.de)
- Ticket system (support.eva.mpg.de)
- Wekan kanban board application
- Kbase - Knowledge Base
Software and configuration
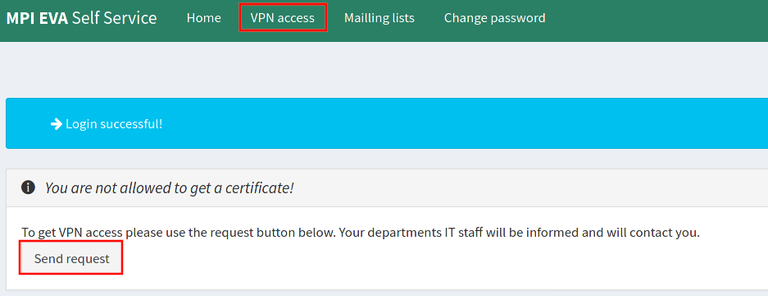
To use VPN you need a special software installed on your computer.
Please use our Self Service (Module: VPN access) to get connected:
https://selfservice.eva.mpg.de
Module VPN access -> Request access via VPN.
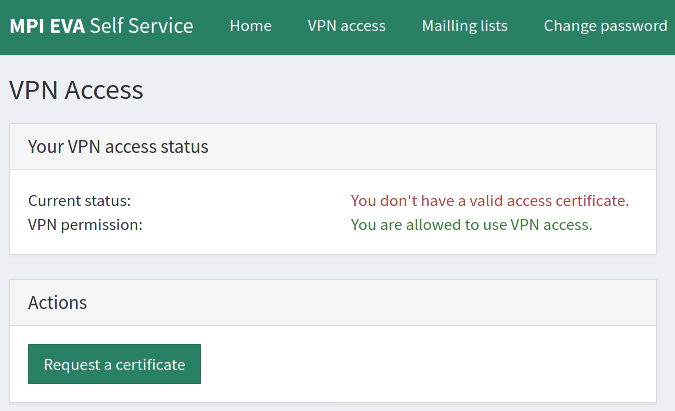
Request a new certificate for VPN access:

Download the package containig certificate and configuration for the operating system of your device.
Validity and renewal of the certificate
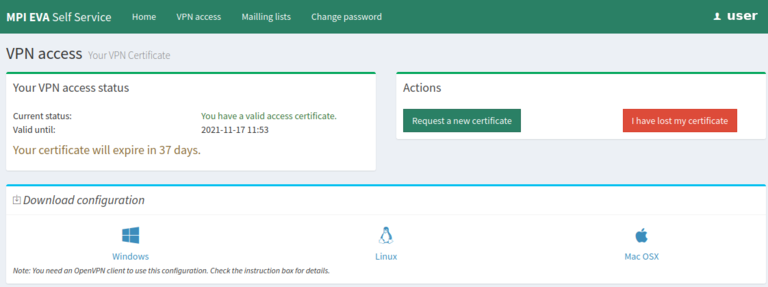
The certificate for VPN access is valid for one year.
You will receive an e-mail one week before the expiry so that you can renew your certificate.
After the extension, please delete the old certificate and download the new certificate again from selfservice portal and configure it according to the tunnel software.
With https://selfservice.eva.mpg.de you can check the validity yourself or you can renew the certificate:
VPN Client Viscosity
Viscosity has been licensed for vpn access by institute clients. For non-institutional clients, please contact the respective departmental IT department for information.
Website: https://www.sparklabs.com/viscosity/
App Installation
For computers managed by Empirum (Windows systems) your department IT is able to assign the program via our software deployment system.
For macOS systems managed by munki run "Managed Software Center" and choose Viscosity from the list of available optional apps.
Client Configuration
Windows
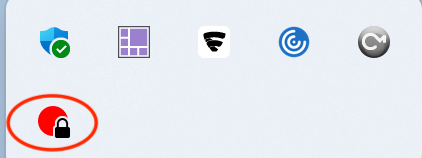
After successful installation of the program open it and find the program icon in the task bar:
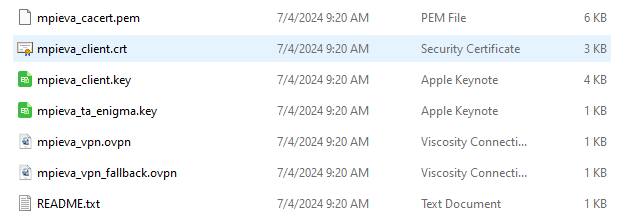
Download configurations (new or extended) from https://selfservice.eva.mpg.de (as explained above) and extract them.
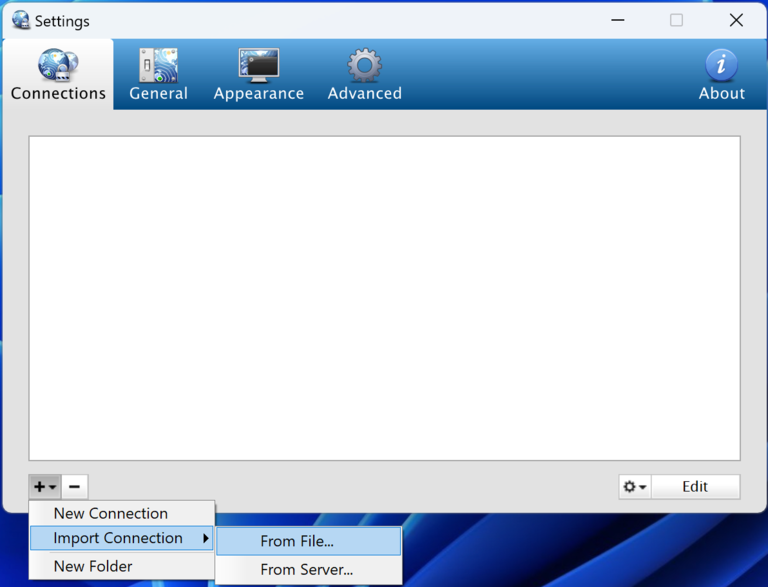
Rightclick the Viscosity item from he bottom right corner and select “Settings”. A new window will appear, select as shown in the window.
Import the default and the fallback configurations.
Select the connection from the taskbar Viscosity icon and login with your MPI EVA credentials.
Done.
macOS
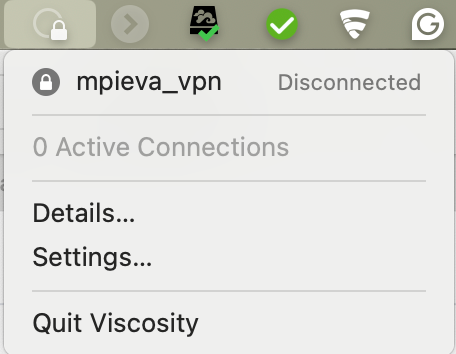
macOS users use Managed Software Center to install Viscosity. After the program has been installed, open it from Applications.
You will find an icon in the top bar (maybe without any configuration).
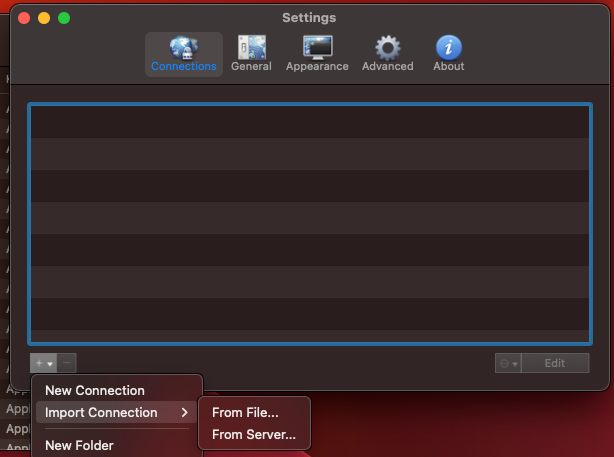

Download your configuration files from https://selfservice.eva.mpg.de .
Extract the downloaded .tar archive and then import the configuration file mpievan_vpn.tblk to Viscosity → Settings → Import Connection → From File
Choose mpievan_vpn.tblk file.
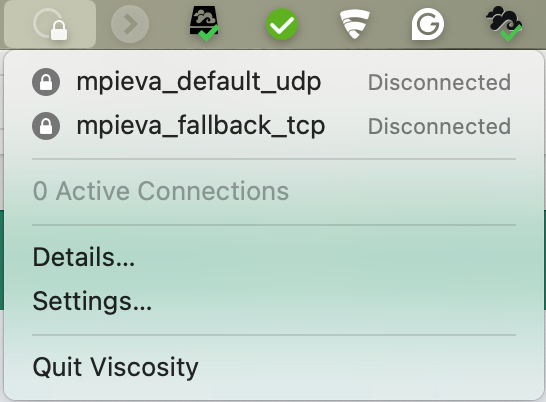
Select your connection from the top menu icon and enter your username and password when requested.
Linux
Using the Command Line Client
Install OpenVpn using the package manager of your distribution:
Debian/Ubuntu:
$ sudo apt-get install openvpn
Fedora(22+):
$ sudo dnf install openvpn
CentOS(6,7)/Fedora(<22):
$ sudo yum install openvpn
Download your personal configuration package by clicking on Linux in the "Download configuration" section above.
Switch to your download folder and move the package to e.g. your home drive:
$ mkdir ~/mpieva_vpn $ cp OpenVPNconfLin_*.tar ~/mpieva_vpn $ cd ~/mpieva_vpn $ tar xvf OpenVPNconfLin_*.tar
Start the connection by executing:
$ openvpn mpieva_default.conf
Please enter your MPI-EVA credentials when prompted:
Auth user: <your MPI username> Auth password: <your MPI password>
Using the Network Manager
Depending on your desktop environment search for packages similar to NetworkManager, vpn and your desktop (f.i. Gnome or KDE). Package names can be different for each linux distribution.
Install NetworkManager and OpenVpn using the package manager of your distribution:
Debian/Ubuntu:
$ sudo apt-get install openvpn network-manager-openvpn network-manager-openvpn-gnome
Fedora(22+):
$ sudo dnf install openvpn NetworkManager-openvpn NetworkManager-openvpn-gnome
Download your personal configuration package by clicking on Linux in the "Download configuration" section above.
Switch to your download folder and move the package to e.g. your home drive:
$ mkdir ~/mpieva_vpn $ cp OpenVPNconfLin_*.tar ~/mpieva_vpn $ cd ~/mpieva_vpn $ tar xvf OpenVPNconfLin_*.tar
Open the NetworkManager connection editor
Create new connection using "Import VPN configuration" or "Import from file"
Import config file mpieva_default.conf from folder ~/mpieva_vpn
Set user name to your login name at MPI EVA
Set "Ask for password every time" in password field
Under "IPv4" look for "Routes" and mark checkbox "Use this connection only for resources on its network"
Save you settings
Configure VPN on Android devices
- Download and untar the Linux configuration file from selfservice.mpg.de, and transfer files to your phone (somehow)
- Install the OpenVPN for Android app (https://play.google.com/store/apps/details?id=de.blinkt.openvpn, semi-officially approved by OpenVPN - https://openvpn.net/vpn-server-resources/connecting-to-access-server-with-android/#official-openvpn-connect-app))
- Open the app and press '+' to add a new connection
- Press 'import' and import the corresponding EVA `.conf` file
Important: the conf file will try to tell the app where all subsequent 'supporting' files are and will make it seem like the files are found. This will _not_ work, so see step 5. - Load supporting files manually:
- Basic Tab > CA Certification field > find in the browser and select `mpieva_cacert.pem`
- Basic Tab > Client Certificate filed > find in the browser and select `mpieva_client.crt`
- Basic Tab > Client Certificate key > find in the browser and select `mpieva_client.key`
- Authentication and Encryption Tab > TLS Auth File field > find in the browser and select `mpieva_ta_enigma.key`
Exit the configuration window and try selecting the connection on the main page of the app.